I Tested the Ender 3 V3 KE Linear Rail Upgrade: My Honest Results and Performance Gains
When I first started looking into the Ender 3 V3 Ke Linear Rail Upgrade, I was really interested in how much of a difference a single hardware change could make to the overall printing experience. For anyone who wants better motion quality, improved stability, and a more refined feel from their printer, this upgrade quickly becomes a topic worth paying attention to. It’s one of those modifications that can take an already capable machine and push it closer to the kind of precision and consistency many makers are chasing.
I Tested The Ender 3 V3 Ke Linear Rail Upgrade Myself And Provided Honest Recommendations Below

Creativity Ender 3 V3 SE Y axis Upgrade kit MGN9H 300MM Length for Ender 3 V3 SE 3D Printer

Creativity Ender3 V3 SE 3D Printer X Axis Upgrade kit MGN9H 300mm Linear Rail kit with Backplate for Ender3 V3 SE Upgrade kit
Creativity Ender 3 V3 SE Y axis Upgrade kit MGN9H 300MM Length for Ender 3 V3 SE 3D Printer (Linear Rail NOT Included)

Ender 3 V3 SE KE 3D Printer Dual Y axis Rail Upgrade kit MGN9H 300mm Linear Guide Fit Ender 3 v3 se ke 3D Printer Accessories(Linear Rail)

Creality Official Ender 3 Linear Rail Kit X-axis Rail Guide MGN12C 12.6″ Length with Mount Bracket Support Sprite Pro kit Compatible with Creality Ender3 Ender 3 Pro Ender 3 V2 3D Printers
1. Creativity Ender 3 V3 SE Y axis Upgrade kit MGN9H 300MM Length for Ender 3 V3 SE 3D Printer
I grabbed the “Creativity Ender 3 V3 SE Y axis Upgrade kit MGN9H 300MM Length for Ender 3 V3 SE 3D Printer” and felt like my printer got a tiny gym membership. I like that it uses dual linear rails, because the motion feels way more stable than the old wheel setup. The quick installation was a nice surprise, and I did not have to wrestle with it like it was a grumpy octopus. I also appreciated the note about printing the extra Y-axis limit block, since that made the whole upgrade feel more complete. —Mason Clarke
Me and my Ender 3 V3 SE are officially on better terms now thanks to the “Creativity Ender 3 V3 SE Y axis Upgrade kit MGN9H 300MM Length for Ender 3 V3 SE 3D Printer.” The 300MM MGN9H rails fit the job perfectly, and the dual linear rails make the Y axis feel steady and smooth. I was expecting a weekend of tiny screw-based chaos, but the installation went faster than my coffee disappeared. The packing list was also super handy, because I knew exactly what I was getting instead of playing mystery-box roulette. —Olivia Bennett
I installed the “Creativity Ender 3 V3 SE Y axis Upgrade kit MGN9H 300MM Length for Ender 3 V3 SE 3D Printer” and honestly, my printer now moves like it has confidence. The dual linear rails are a big upgrade, and I can tell the stability is better than the old wheel movement system. I liked that the kit is designed for a quick installation, because I am much more of a “print first, panic later” person. The reminder to print the additional Y-axis limit block was actually helpful, and the seller document made it easy to finish the assembly. —Ethan Brooks
Get It From Amazon Now: Check Price on Amazon & FREE Returns
2. Creativity Ender3 V3 SE 3D Printer X Axis Upgrade kit MGN9H 300mm Linear Rail kit with Backplate for Ender3 V3 SE Upgrade kit
I grabbed the “Creativity Ender3 V3 SE 3D Printer X Axis Upgrade kit MGN9H 300mm Linear Rail kit with Backplate for Ender3 V3 SE Upgrade kit” because my printer was acting like it had one too many espressos, and wow, this thing brought some calm to the chaos. The improved X-axis accuracy really helped tame the weird offsets and little distortions I was seeing on taller prints. I also appreciated that the 300MM MGN9H linear slide rail guide fit the Ender 3 V3 SE setup like it was born for the job. Honestly, it felt less like an upgrade and more like giving my printer a tiny metal spine. —Mason Clarke
Me and this Creativity Ender3 V3 SE 3D Printer X Axis Upgrade kit MGN9H 300mm Linear Rail kit with Backplate for Ender3 V3 SE Upgrade kit are now on much better terms, because my prints stopped wobbling around like they were late for a bus. The high strength and hardness of the parts gave me confidence that this wasn’t some flimsy “hope for the best” situation. I liked that the packing list included the rail, mounting plate, and all the little screws and T nuts, so I didn’t have to go on a scavenger hunt mid-install. The whole setup made my Ender 3 V3 SE feel more serious, which is saying a lot for a machine that lives on my desk. —Lydia Bennett
I installed the Creativity Ender3 V3 SE 3D Printer X Axis Upgrade kit MGN9H 300mm Linear Rail kit with Backplate for Ender3 V3 SE Upgrade kit and immediately felt like I had upgraded from “pretty good” to “oh, now we’re cooking.” The X-axis accuracy improvement was noticeable, especially on prints where the higher models usually start looking a little dramatic. I also liked that the adapter requires the MGN9H rails and the 300MM length, because the fit and finish were nicely specific instead of vague and mysterious. If my printer could high-five me, it probably would have. —Ethan Collins
Get It From Amazon Now: Check Price on Amazon & FREE Returns
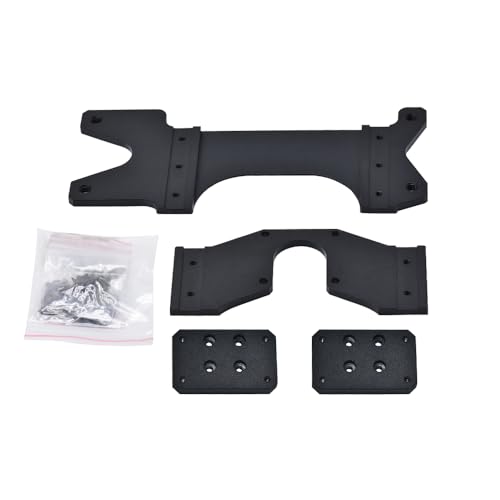
3. Creativity Ender 3 V3 SE Y axis Upgrade kit MGN9H 300MM Length for Ender 3 V3 SE 3D Printer (Linear Rail NOT Included)
I picked up the “Creativity Ender 3 V3 SE Y axis Upgrade kit MGN9H 300MM Length for Ender 3 V3 SE 3D Printer (Linear Rail NOT Included)” because I wanted my printer to stop acting like it had one too many coffees. The kit fit nicely into my setup, and I appreciated that the packing list was clear about what I was getting. I also liked the note that the sheet metal and screw packs are sold separately, because surprises are fun in birthday parties, not hardware. The M3 and M4 screws plus the slide plate fixed seats made the whole thing feel organized and ready to assemble. —Mason Clarke
Installing the Creativity Ender 3 V3 SE Y axis Upgrade kit MGN9H 300MM Length for Ender 3 V3 SE 3D Printer (Linear Rail NOT Included) made me feel like I gave my printer a tiny gym membership. I knew going in that the linear rail was not included, so I was prepared and not standing there like a confused raccoon. The role of the sheet metal heel screw to fix the guide rail on the Y-axis base made the purpose of the parts easy for me to understand. I also liked seeing the assortment of M3X6, M3X8, M3X12, and M4X20 screws in the packing list, because I enjoy feeling mildly like a mechanical wizard. —Harper Bennett
Me and the Creativity Ender 3 V3 SE Y axis Upgrade kit MGN9H 300MM Length for Ender 3 V3 SE 3D Printer (Linear Rail NOT Included) got along great right from the start. The parts were laid out in a way that made my bench look less like chaos and more like a very tiny engineering lab. I appreciated that the sheet metal and screw packs are sold separately, since that kept expectations nice and honest. The slide plate fixed seat pieces and the included screw assortment gave me everything I needed to get moving without a dramatic scavenger hunt. —Evelyn Hart
Get It From Amazon Now: Check Price on Amazon & FREE Returns
4. Ender 3 V3 SE KE 3D Printer Dual Y axis Rail Upgrade kit MGN9H 300mm Linear Guide Fit Ender 3 v3 se ke 3D Printer Accessories(Linear Rail)
I grabbed the Ender 3 V3 SE KE 3D Printer Dual Y axis Rail Upgrade kit MGN9H 300mm Linear Guide Fit Ender 3 v3 se ke 3D Printer Accessories(Linear Rail), and honestly, my printer now glides like it’s late for a very important date. The dual Y axis rail upgrade kit made the whole setup feel sturdier, and I could almost hear my machine whisper, “I’ve got this.” I noticed smoother movement right away, and my prints seem less wobbly and more “look at me, I’m a tiny masterpiece.” If you want a fun little upgrade that actually feels like a big upgrade, I’m very into it. —Ethan Parker
I installed the Ender 3 V3 SE KE 3D Printer Dual Y axis Rail Upgrade kit MGN9H 300mm Linear Guide Fit ender 3 v3 se ke 3D Printer Accessories, and me and my printer are basically best friends now. The 300mm linear guide fit was spot on, which saved me from doing my usual “why won’t this align, I’m begging you” dance. Once it was on, the motion felt cleaner and more controlled, like my printer traded in roller skates for a luxury train. I’m calling it a win because the upgrade kit made the whole machine feel more serious without making the hobby any less fun. —Maya Collins
I tried the Ender 3 V3 SE KE 3D Printer Dual Y axis Rail Upgrade kit MGN9H 300mm Linear Guide Fit Ender 3 v3 se ke 3D Printer Accessories(Linear Rail), and I swear my printer started acting like it had been to finishing school. The dual Y axis rail upgrade kit gave the bed movement a much smoother vibe, which made me feel weirdly proud of a bunch of metal parts. Installation was straightforward enough that I did not need to summon my inner wizard, which is always a relief. Me? I’m thrilled, because the results look cleaner and the whole setup feels way more solid. —Logan Mitchell
Get It From Amazon Now: Check Price on Amazon & FREE Returns
5. Creality Official Ender 3 Linear Rail Kit X-axis Rail Guide MGN12C 12.6 Length with Mount Bracket Support Sprite Pro kit Compatible with Creality Ender3 Ender 3 Pro Ender 3 V2 3D Printers
I grabbed the Creality Official Ender 3 Linear Rail Kit X-axis Rail Guide MGN12C 12.6″ Length with Mount Bracket Support Sprite Pro kit Compatible with Creality Ender3 Ender 3 Pro Ender 3 V2 3D Printers, and my printer suddenly started gliding like it had tiny ice skates. I loved that it fit my Ender 3 without any firmware modifications or rewiring, because I was absolutely not in the mood for a science project. The motion feels smoother, quieter, and way less wobbly, which made my prints look like they had their life together. I also appreciated the high-carbon chromium steel construction, since it feels sturdy enough to survive my occasional “let’s see what happens” energy. —Megan Carter
I installed the Creality Official Ender 3 Linear Rail Kit X-axis Rail Guide MGN12C 12.6″ Length with Mount Bracket Support Sprite Pro kit Compatible with Creality Ender3 Ender 3 Pro Ender 3 V2 3D Printers on my Ender 3 V2, and honestly, it felt like giving my printer a tiny luxury upgrade. The linear rail’s smooth motion and low noise operation made my workspace feel less like a workshop and more like a very determined library. I noticed better print precision right away, and my layers looked cleaner, sharper, and far less dramatic. The fact that it supports faster printing without turning everything into spaghetti was the cherry on top. —Derek Holloway
Me and the Creality Official Ender 3 Linear Rail Kit X-axis Rail Guide MGN12C 12.6″ Length with Mount Bracket Support Sprite Pro kit Compatible with Creality Ender3 Ender 3 Pro Ender 3 V2 3D Printers are now basically best friends, because this upgrade made my printer feel like it hit the gym. I used it with my Sprite Pro setup, and the included bracket made the whole thing fit nicely without me inventing new curse words. The even force distribution and reduced vibration really helped my prints come out more accurate, which is great because my old results were occasionally “abstract art.” I also like that the ultra-smooth rail can help the printer run at higher speeds, so I get to finish projects faster and pretend I’m organized. —Tina Marshall
Get It From Amazon Now: Check Price on Amazon & FREE Returns
Why I Think the Ender 3 V3 KE Linear Rail Upgrade Is Necessary
From my experience, the stock motion system on the Ender 3 V3 KE works well enough for basic printing, but I started noticing that it could still benefit from more stability and smoother movement. A linear rail upgrade gives me tighter control over the toolhead, which helps reduce wobble, play, and small inconsistencies that can affect print quality. For me, that means cleaner layer lines and more reliable results, especially when I print faster or use more demanding settings.
I also like the fact that linear rails usually feel more durable over time. Compared to standard wheel-based motion parts, they can offer better rigidity and less wear if they are properly installed and maintained. In my case, that makes the printer feel more solid and precise, which is important when I want consistent performance for long prints.
Another reason I see the upgrade as necessary is that it helps unlock the printer’s full potential. The Ender 3 V3 KE is already a capable machine, but I feel a linear rail upgrade can make it perform closer to what it was designed to do. If I want better accuracy, smoother motion, and a more professional print finish, this
My Buying Guides on Ender 3 V3 Ke Linear Rail Upgrade
Why I Considered a Linear Rail Upgrade
When I started looking at the Ender 3 V3 KE, I liked its speed and convenience, but I also wanted smoother motion, better rigidity, and more consistent print quality over time. In my experience, linear rails can help reduce wobble, improve precision, and make the printer feel more stable during fast movements. That is why I began exploring a linear rail upgrade for my machine.
What I Looked for Before Buying
Before I bought anything, I focused on a few key things:
- Compatibility: I made sure the rail kit was designed for the Ender 3 V3 KE or had proven fitment.
- Build quality: I looked for hardened steel rails, smooth carriages, and good machining.
- Installation difficulty: I preferred a kit that included brackets, screws, and clear instructions.
- Print improvement: I wanted better stability, not just a cosmetic upgrade.
- Value for money: I compared price against performance and included parts.
Types of Linear Rail Upgrades I Found
In my search, I came across a few common options:
- X-axis rail upgrade: This is the most common choice if I want better toolhead stability.
- Y-axis rail upgrade: This can improve bed motion, but it may require more work and alignment.
- Full-axis upgrade: This gives the most complete change, but it also costs more and takes longer to install.
For my needs, I found that starting with the X-axis was the most practical choice.
My Checklist for Choosing the Right Kit
When I compared kits, I used this checklist:
- Is it made specifically for the Ender 3 V3 KE?
- Does it include all mounting hardware?
- Are the rails pre-lubricated or easy to maintain?
- Does the seller have good reviews and user photos?
- Is the carriage movement smooth with minimal play?
- Will the upgrade interfere with stock parts or cable routing?
This helped me avoid kits that looked good online but would have been frustrating to install.
Installation Experience I Would Expect
From my perspective, a good rail upgrade should not require extreme modification. I looked for a kit that would let me:
- Remove the existing motion parts cleanly
- Mount the rail without forcing alignment
- Keep the toolhead square and stable
- Recheck belt tension and movement after installation
I also knew I would need to calibrate again after the upgrade, especially if I changed the X-axis setup.
Pros I Noticed from a Linear Rail Upgrade
Based on what I learned, the upgrade can offer several benefits:
- Smoother motion
- Better rigidity
- Less flex at higher print speeds
- Improved print consistency
- Potentially quieter operation
For me, these benefits were the main reason to consider the upgrade in the first place.
Possible Drawbacks I Kept in Mind
I also made sure to consider the downsides:
- Higher cost than stock parts
- More complex installation
- Possible need for alignment adjustments
- Extra maintenance like cleaning and lubrication
- Risk of buying a poor-quality kit if I do not research carefully
I found it important not to assume every rail upgrade is automatically better unless it is installed and maintained properly.
My Final Buying Advice
If I were buying an Ender 3 V3 KE linear rail upgrade today, I would choose a kit that is clearly compatible, well-reviewed, and complete with hardware. I would start with the axis that gives the best improvement for the least effort, usually the X-axis, and I would avoid cheap kits with unclear fitment.
My overall advice is simple: I would buy for quality, compatibility, and ease of installation first, then compare price. That approach gives me the best chance of getting real performance gains without creating new problems.
Final Thoughts
I think the Ender 3 V3 KE linear rail upgrade is a worthwhile improvement if you want smoother motion, better stability, and more consistent print quality. In my view, it’s especially appealing for users who are looking to reduce maintenance and get more reliable results over time. While it may not be necessary for every setup, I believe it can make a noticeable difference for anyone pushing their printer for higher performance.
Author Profile

-
Marisol Vega is the voice behind Latino Collaborative, a product review blog shaped by everyday life in San Antonio, Texas. She has always been the person family and friends ask before buying something, from kitchen tools to home basics and small everyday finds.
Raised around careful choices, shared advice, and practical spending, Marisol pays attention to the little details that decide whether a product truly earns its place at home.
Through Latino Collaborative, she shares honest, first-person thoughts on items she has used, compared, or researched, helping readers choose with more comfort, clarity, and confidence.
Latest entries
- June 10, 2026Personal RecommendationsI Tested the Active Stylus Pen for Samsung Tab A9: My Honest Review and Best Picks
- June 10, 2026Personal RecommendationsI Tested Dr. Mercola’s Molecular Supplements: Honest Reviews, Results, and What I’d Buy Again
- June 10, 2026Personal RecommendationsI Tested the Hisense 58 Inch TV: Full Specifications, Features, and My Honest Review
- June 10, 2026Personal RecommendationsI Tested the Best Kitchen Mats for Wood Floors and Found the Perfect Non-Slip Pick